 Save
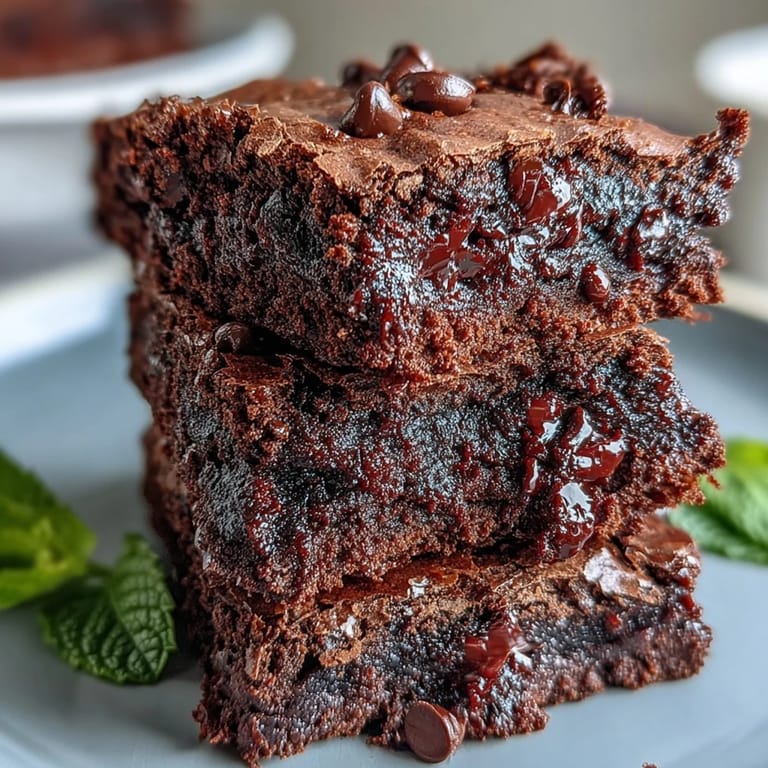
Save My coworker Sarah showed up to the office on March 16th with a tiny green-tinged brownie and I was instantly hooked—one bite and the cool mint hit first, then the richness of chocolate wrapped around it like a secret. She wouldn't tell me the recipe for weeks, just smiled mysteriously whenever I asked, until finally admitting she'd invented them the night before on a whim. Now they're my go-to when I need something that feels fancy but comes together faster than I'd expect, especially when the calendar flips to St. Patrick's Day season and I want to contribute something that actually tastes good instead of being green just for the sake of it.
I made a batch for my book club last spring and watched four grown adults go silent for a moment after taking their first bite—that's when you know you've done something right. Nobody was expecting the mint to be so integrated into the chocolate rather than sitting on top of it like an afterthought, and that's when I understood why Sarah had guarded this recipe so carefully.
Ingredients
- All-purpose flour: The structure-builder that keeps these bites tender without turning them cakey, so don't skip the measuring step.
- Unsweetened cocoa powder: This is where the deep chocolate flavor lives, and quality matters here since there's nowhere to hide.
- Baking powder: Just enough to give a gentle lift without making them puffy.
- Salt: The unsung hero that makes the chocolate and mint flavors pop.
- Unsalted butter: Let it cool slightly after melting so it doesn't scramble your eggs when combined.
- Granulated sugar: Whisking this with the butter creates the emulsion that keeps bites moist.
- Eggs at room temperature: They incorporate more evenly and create a better texture than cold eggs straight from the fridge.
- Pure vanilla extract: Use the real stuff, not imitation, since it plays beautifully with the peppermint.
- Peppermint extract: This is the star player—a little goes a long way, so resist the urge to double it.
- Green food coloring: Optional but it does make them look festively intentional without being overwhelming.
- Mini chocolate chips: Distribute better in small bites than regular chips and give you chocolate in every mouthful.
- Andes mints or mint chocolate pieces: These add texture and concentrated bursts of flavor, though you can absolutely skip them if you prefer simplicity.
Tired of Takeout? 🥡
Get 10 meals you can make faster than delivery arrives. Seriously.
One email. No spam. Unsubscribe anytime.
Instructions
- Prepare your workspace:
- Preheat your oven to 350°F and get your mini muffin tin ready with greasing or liners—this takes two minutes and prevents the scramble later. I learned the hard way that a cold tin and warm batter are not friends.
- Mix your dry team:
- Whisk flour, cocoa powder, baking powder, and salt together in a medium bowl until they're evenly distributed. This prevents cocoa lumps from hiding in your final batter.
- Build the wet base:
- Whisk your cooled melted butter with sugar until it looks slightly thickened and paler than it started, which means the sugar is beginning to dissolve. Add your eggs one at a time, whisking well between each addition so they fully incorporate rather than sitting in pools.
- Flavor the mixture:
- Pour in vanilla and peppermint extract and add a couple drops of green coloring if using, stirring until the color is even. This is the moment the batter goes from looking like regular brownie mix to something clearly special.
- Marry wet and dry:
- Gently fold the dry ingredients into the wet mixture using a spatula, stopping as soon as you don't see streaks of flour—overmixing here creates tough bites instead of tender ones. The batter will be thick and glossy.
- Add the mix-ins:
- Stir in your chocolate chips and chopped mint pieces, distributing them evenly so each bite gets its fair share. I sometimes reserve a few extra chips to press into the top for looks.
- Fill and top:
- Spoon the batter into your prepared tin, filling each cup about three-quarters full since they'll puff slightly. A small ice cream scoop makes this even and prevents overfilling.
- Bake with patience:
- Bake for 13 to 15 minutes until a toothpick inserted into the center comes out mostly clean with a few moist crumbs still clinging to it. Underbaked is better than overbaked here—they'll continue cooking slightly as they cool.
- Cool properly:
- Let them rest in the tin for five minutes so they set up enough to remove without crumbling, then transfer to a wire rack. This prevents the bottom from getting too soft.
 Save
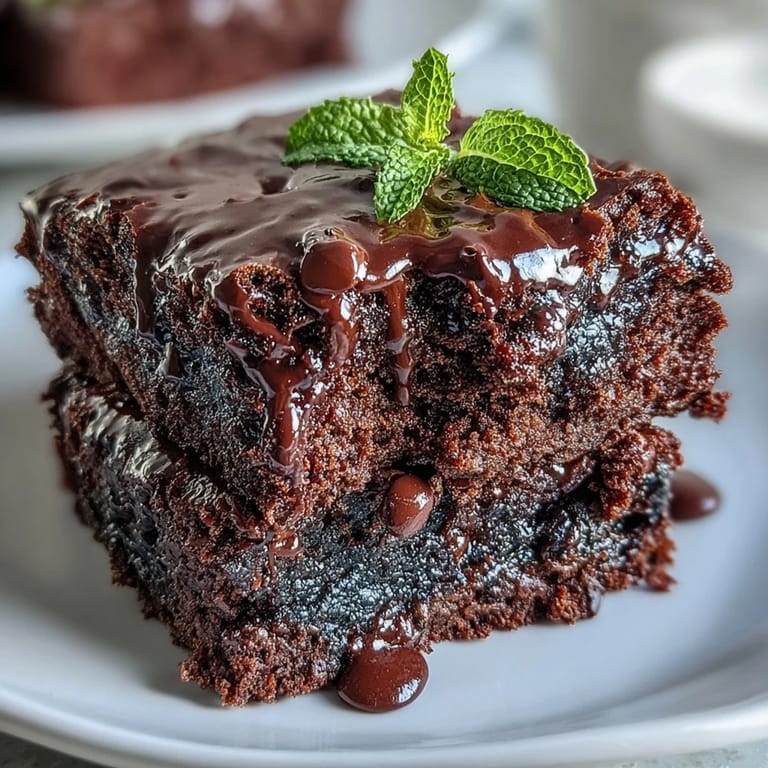
Save There's something almost magical about the moment these bites cool and you realize you can eat them with your hands, how they're substantial enough to feel like a real dessert but small enough that having just one more is always reasonable. My partner now requests these in March before I even think about making them.
The Mint-Chocolate Science of It All
Peppermint and chocolate are a classic pairing because they're neurologically perfect together—the cooling sensation of menthol actually enhances the perception of chocolate flavor on your palate, which is why this combination feels so balanced and crave-worthy. When you bake the peppermint directly into the batter instead of adding it as a topping, it distributes evenly and becomes part of the whole rather than a separate layer, creating something more sophisticated than the average mint chip treat.
Storage and Keeping
These bites stay fresh for five days in an airtight container at room temperature, though I rarely have to worry about longevity since they disappear quickly. If you need them to last longer, they freeze beautifully for up to a month—just thaw them for about thirty minutes before eating to get that optimal fudgy texture back.
Variations and Flexibility
The base recipe is forgiving enough to play with, and I've experimented with it more times than I'd like to admit while trying to perfect the balance. You can adjust the mint intensity by tweaking the extract, swap out Andes mints for crushed candy canes in winter, or even skip them entirely if mint isn't your thing and you just want a simple brownie bite instead.
- If you're making these for someone sensitive to food coloring, just skip it entirely—the bites are still festive and delicious without the green hue.
- For extra fudginess, pull them from the oven at the thirteen-minute mark even if the toothpick doesn't look quite done.
- A small cookie scoop makes portioning effortless and ensures every bite bakes evenly.
 Save
Save These bites have become my answer to bringing something meaningful to St. Patrick's Day gatherings, proof that seasonal celebrations don't require gimmicky recipes or artificial shortcuts. They're just chocolate and mint treated with respect and baked into something that tastes like someone cared.
Recipe FAQs
- → What gives the brownie bites their mint flavor?
The mint flavor comes from peppermint extract and optional chopped Andes mints mixed into the batter.
- → Can I omit the green food coloring?
Yes, the green food coloring is optional and used only to give a festive appearance without affecting flavor.
- → How do I ensure the brownie bites stay fudgy?
Be careful not to overbake; bake until a toothpick shows a few moist crumbs for optimal fudgy texture.
- → What pan should I use for baking these brownies?
Use a mini muffin tin or mini cupcake liners to create perfect bite-sized portions.
- → How should I store leftover brownie bites?
Store them in an airtight container at room temperature for up to 5 days to maintain freshness.